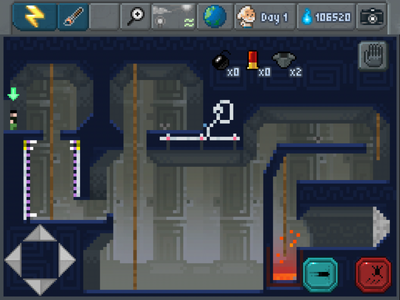
Relic Hunter is a 16-stage campaign for The Sandbox. In it, the player discovers Jone's abilities and his adventurous temper! Ready? Action!
Day 1: Dead End
You did a great job dealing with the Stalker, but there's much more to be done! Make your way to the heart of this Alien temple!
- To uncoil the ropes, activate the button in the room above.
- Ropes let you access hard-to-reach places. Just jump towards them, and while attached you can move up and down at will.
Day 2: Temple
Nice work, but there are still many dangers ahead, so be prepared. In fact, some Mercenaries have been spotted in the area!
- The key is the glowing red pixel above the electric wire. The door is the red column above the acid.
Day 3: Bust Out
Just as I expected, Juni- ... Jones is in trouble. Caught by Grunts...please help him out, and be careful! Afterwards, continue to the Temple.
- Time your jumps properly to avoid the lasers. Rhythm is the key.
- The key is at the right-edge of the level.
Day 4: Whip
Ok, pal...let's see if you remember the basics! Use that whip of yours and grab the ceiling. The whip will attach like a rope and let you swing!
- By aiming up and pressing the whip, you'll attach to the ceiling.
- If you're already hooked and don't want to jump + whip, just whip again while hooked and you'll lash to the direction you're facing.
Day 5: Whip 2
Looks like that whip will be quite useful in these Catacombs. Just try not to break anything.
- Avoid the acid. Unlike Arnold, Jones isn't very resilient.
Day 6: Stone Tomb
Jones should be fine for now, so I'm back with you, Arnold. Let's see...there's an easy way to dispose of these Grunts, but you'll need those explosives.
- Get the Bomb Room key from the guard on the level's left side.
- Place the bombs on the ventilation hatch and make the roof cave in on the remaining guards.
Day 7: Flood it
And now back to you, kid. Hmm...this one's easy. You need to flood the area to reach the exit. You know how to swim, right?
- To reach the other side, you must flood the tank.
- Use the key to release the water into the tank.
Day 8: Swarm
This place is starting to bug me. You'll probably need to distract that insect swarm. They are dangerous - trust me.
- Go underwater to avoid the swarm.
- Call the swarm and tempt it to attack. Then sneak underwater and get everything done.
Day 9: Key Master
Your whip can reach things you can't, so get the key and find the exit! Also, there's a Boomerang nearby that you can activate buttons with.
- With the whip and the boomerang you can activate buttons and levers from afar.
Day 10: Boomerang
There are a few obstacles, but the entrance is in sight. Knock off those guards, and...snakes? Why'd it have to be snakes?!
- You can defeat guards and snakes with the boomerang.
Day 11: Blackest Black
It's pitch black in there...use those torches and tread carefully. Darkness usually means traps...
- Torches provide a small light that illuminates the way ahead. They can activate light sensors, too.
- In the level's second part, use the torch to activate the light sensors and find the safe path. Blue is safe, red is not.
Day 12: Night Strike
Their encampment is strongly fortified, Arnold. I recommend you sneak in via the path below and attack them from behind!
- In order to reach the key in the piranha pond, use the button beside the underground armory to the left. You'll drain the water and kill the Piranhas.
- There's a missile launcher on the top floor of the Mayan tower behind the Encampment. Use it to attack the Mercenaries from distance.
Day 13: Stone Viper
This is it, Junior! To reach that diamond you'll need to block the energy source powering the Statue. Use the Push Blocks hidden in the area.
File:HRelicD13.PNG
- To pass through the quicksand challenge, use the whip to latch onto the platforms and avoid drowning.
- Once you release the Blocks, push them by moving towards them. Be careful not to push them into a dead end. If that happens, you'll have to restart.
Day 14: Shortcut
We're back in the Alien Temple. Jones suggested a different route because this is supposedly the best shortcut. Mind the piranhas.
- Open the gate so that the piranhas feed on the fish instead of your flesh.
- There's a small air pocket near the exit. If you're running low on air, use it to avoid drowning!
Day 15: Spiked
Damnit, Junior! Your shortcut was booby trapped and Arnold is stuck! At least we're close to the Vault, like you said. Go help him!
- Move the PushBlock and use it as a stepping stone.
- Use the whip to climb walls.
Day 16: The Gate
At last, the Vault! There appears to be a strange device in the center. Let's try to activate it!
- The Heat Laser can kill the Mummy, but be careful not to kill yourself!
- To activate the strange device, Arnold and Jones must press their buttons simultaneously.


